Iowa Youth Bowhunter Sets Record with “Junkyard” Buck!
One look at the beast and you’ll see why they call him the “Junkyard” Buck.
I mean what else could you call such a giant whitetail?
The chase began back in October of 2015, on a small property deep in the
heart of southern Iowa’s big-buck country.
Doug Knott and his family had just acquired the small parcel (just under 30-acres).
They bought it for the hunting. But they will tell you that, even in Iowa, they weren’t
exactly planning on finding a GIANT that first year on that property.
“We moved the cameras around a bit and got our first picture of the beast on October 05, 2015”, says Doug. “He was very impressive!”
This trail camera picture of “Junkyard” reveals how he got his name! He has “junk” everywhere on his head! This picture is from the fall of 2016 when he was 4.5 years old.
Doug continued, “As far as we could figure from a few trail camera pictures that fall, the buck had 18-points and would probably score somewhere in the 180’s”.
Text messages started flying around between family members and the name “Junkyard” buck was justifiably given — courtesy of their cousin Scott.
“I’ll tell you what — the Junkyard buck quickly became an everyday mention among our family,” says Doug!
And the hunt for the “Junkyard” buck was on!
Thirteen-year-old Tyler and his father Doug were playing checkers with the buck.
They would get a picture right here and a picture somewhere over there of the buck throughout that first fall.
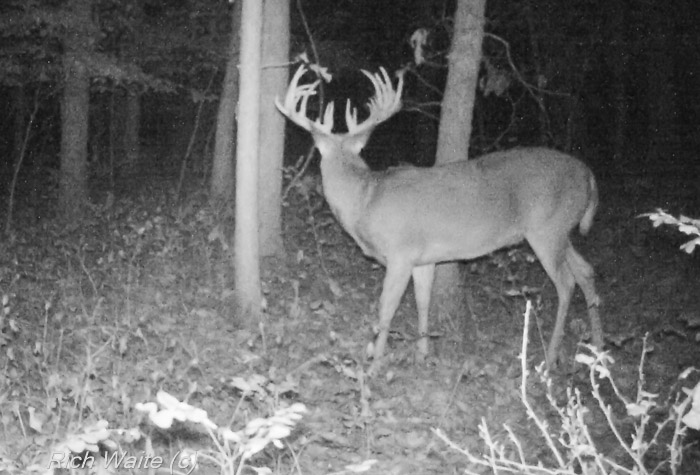
Here is a trail camera shot of Junkyard in 2016.
“We were starting to get a feel for the places the buck would spend much of his time with the
aid of those trail camera pictures” said Doug.
Then, on October 27, 2015, the young hunter Tyler and his father Doug would BOTH have encounters with the Iowa monster buck they call Junkyard.
But both with Junkyard buck encounters were in very low light. Not good for taking a shot!
“Then, on November 01, 2015, Junkyard came past my stand nudging does,” said Doug. “And I thought I made an easy shot”!
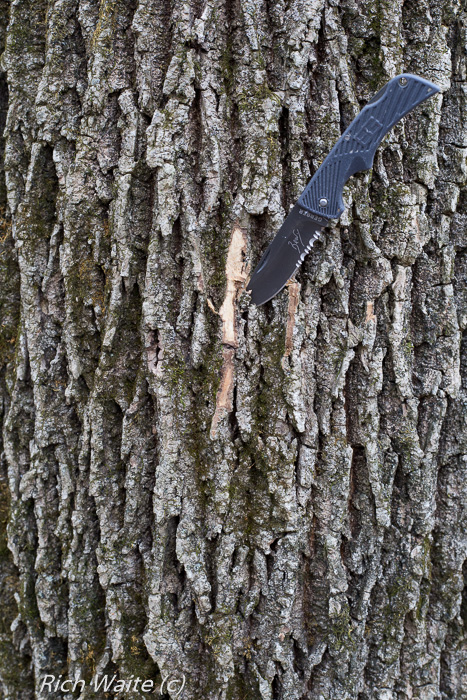
“Unfortunately, later we learned that my shot wasn’t so perfect,” continued Doug. “We learned that a small limb near my stand was cut by my broadhead”.
And so it sometimes goes in bow hunting.
Even the smallest of obstruction between hunter and the hunted can turn what appears to be great luck into a bag of sour apples.
“There was a decent blood trail for 120 yards and then it just stopped”, said Doug of the shot.
“My son Tyler and I were BOTH sick about wounding the buck,” he continued. “However, we learned that Junkyard was still alive through various trail camera pictures of him again that started showing up just a week after that shot”.
“We saw Junkyard off and on during November and his condition pulled at our hearts,” mentions Doug.
“He was clearly hobbling on three legs, and he seemed disturbed by other bucks chasing does around his area,” Doug continued.
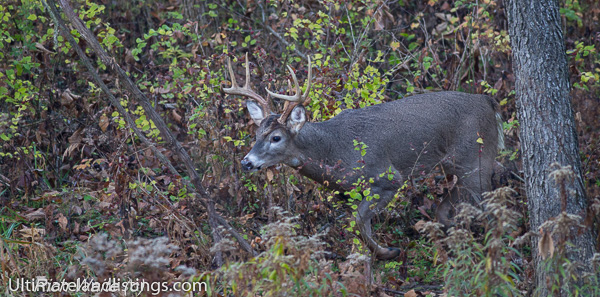
And Tyler says, “I watched Junkyard one time as he made a large circle, thrashing trees and making scrapes”.
And it turns out that Tyler came to full draw on the monster Iowa buck that day! But it was a straight-on, low-odds, shot. A shot that is very risky for a bow hunter to take.
A Mature Hunter
The monster Iowa buck was toying with a 13-year old, young man’s, nerves just standing there 15-yards distant!
“I held back and held back and finally had to slowly let down the string,” said Tyler of that encounter.
Resisting such temptation is no easy thing for any hunter – let alone a 13-year-old boy!
But as Tyler’s father Doug will say, “He is a very mature hunter”.
And I can attest to that, even with my limited observations and time spent around him — Tyler seems to have the maturity level of someone a decade or more to his elder.
And his Dad will tell you, too, that his son can shoot a bow (or a gun)!
“Tyler can sit there and shoot small groups into a circle at 50 or 60 yards with his bow”.
But, and back to the story now, having the monster buck of your dreams just standing there near
your tree for minutes on end is unnerving and a hard opportunity not to take – it’s a lot of tempting bait to refuse for any hunter, let alone a youth with limited first-hand experiences to draw upon.
“I ended up drawing back one last time,” quipped Tyler.
Unfortunately for Tyler, the bow’s limb hit something and the shot grazed off.
And the Junkyard buck finally decided that is was due time to get the heck out of Dodge!
And leave he did! But not before accidentally stepping on Tyler’s carbon arrow, snapping it in half!
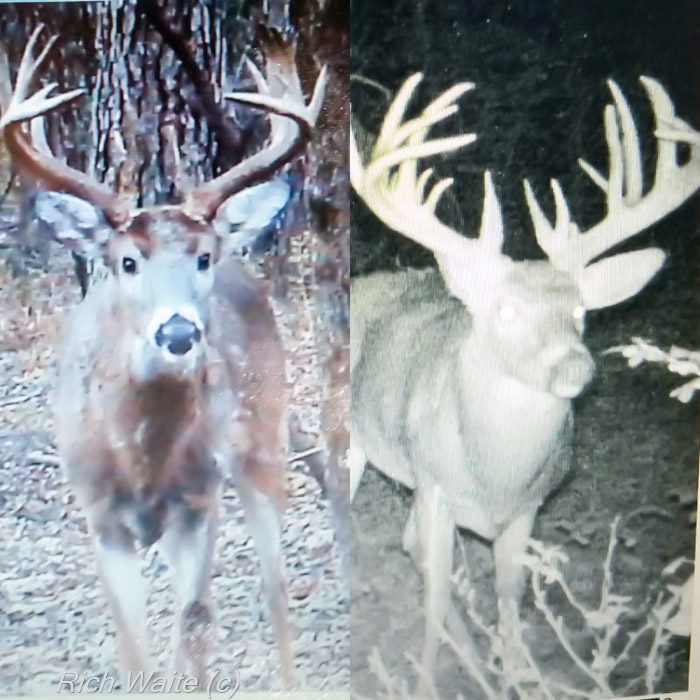
Here are trail camera images of “Junkyard” revealing how much difference just one year can make!
The Iowa Junkyard Buck Wins the first round
“We decided that we had our chances at the Iowa beast that year and that that was enough,” said Doug.
“We decided that we’d just let the beast roam that fall and take our chances if he would make it to the next season. We had our chances and he won”!
“So, continued Doug, we just decided to run cameras on video mode and get as much evidence of this buck as we could for the next year.” “We crossed our fingers that he would make it to the next year”. (I would be crossing my toes too!)
But would he?
“We just didn’t know if the Junkyard buck was still healthy enough to make it through the winter or if some gun hunter would get him,” said Doug.
“We figured he was just 3.5 years old from our experience with seeing him both on camera and on the hoof. But he was looking ragged”. “We just didn’t know if he would make it but we figured that he deserved a chance at that point so we didn’t go after him anymore that year.”
Only time will tell.
Amazingly enough, as time went on, evidence of the junkyard buck came in via trail cameras!
“We learned that Junkyard was indeed going to survive,” touted Doug!
“We got him on camera in early summer of 2016 and he looked as healthy as ever,”! “He was heavy and robust”!
And before they knew it another bow season had rolled around.
And it was time for round two with Junkyard.
Doug and Tyler began “seeing” Junkyard fairly regularly via trail cameras starting on September 30, 2016.
And believe this or not, but Junkyard was captured on a trail camera standing right under one of their tree stands in broad daylight on that day of September the 30’th. Which, oh by the way, just happened to be the same day that Tyler shot a different Iowa monster buck! This big whitetail “only” scoring 165″!
Not bad, not bad at all!
That hunt took place during the Iowa youth season (and, well, is really a whole other story).
You see, it turns out that Tyler shot it while hunting out of a tin lean-to shanty sort of a deal.
A place the buck was using to bed in for protection on hot days.
Tyler and his dad waited for this buck inside the shanty for about 12 hours — Tyler studying for his home-school work while he waited nonetheless!
And the buck finally showed — and Tyler greeted it with a bang!

Tyer and his 165″ inch Iowa “tin-shack” buck!
And it was a BIG buck — somewhere here or there around 165-inches!
But the buck wasn’t the Junkyard buck and Tyler still had a bow tag! (and a late muzzleloader
tag — and oh, by the way, Tyler shot another buck then too! Why am I not surprised?)
October 31’st 2016 — The Big Day
“It was warm and muggy on my way into the place we call the “Rob Stand” said Tyler.
“It was just after 8 am. when I saw my first deer”.
It was a buck we called “Slim Jim” and he came right in over a creek crossing trail soon after I’d rattled!”
How big was Slim Jim? Oh — 170 B & C-inches or so!
But it wasn’t the Junkyard Buck.
“We’d decided that we would only shoot Junkyard that year, so I let Slim Jim walk”, said Tyler. “Slim Jim would have been my biggest bow kill but we were after the Junkyard buck.
Fourteen-years-old? Mature hunter? Dumb question!
This kid is solid as a rock!
Just after Slim Jim walked through Tyler’s shooting lane he caught movement out of the corner of his eye.
“It was Junkyard”, exclaimed Tyler!
And he was on the same trail that Slim Jim had just crossed the small creek on.
Face-Face!
Before Tyler knew it, he was face to face with the Iowa mega-giant monster buck of his dreams.
A buck he’d dreamed about many a night!
A buck he’d daydreamed about many a day!
And in just moments, the Junkyard buck had closed the distance to just 21-yards!
“I waited as calmly as possible for Junkyard to close the gap,” said Tyler.
As any bowhunters can attest things happen in a dreamy blur at that moment in time. The moment of truth or consequences
when the bowhunter releases the arrow from the string.
“Just where did the shot hit the buck,” is always the ultimate question of critical importance at the moment of arrow impact on deer.
“It looked like a good hit but that it was probably a liver hit as well,” said Tyler. “I watched the Junkyard buck bed down several times before eventually limping off”.
“The whole time Slim Jim stood at about 60 yards just watching things happen,” continued Tyler.
What to do…what to do?
When in doubt wait it out…is the old bowhunter adage that has more truth to it than some people may attest.
“We decided to wait several hours before ultimately making a grid search and finding the buck,” said Tyler.
It turned out that Junkyard had only gone about 200-yards.
“Throughout that whole process — from the time I saw Junkyard at that creek crossing until after we found him, it felt like a dream,” said Tyler. “I kept asking myself is this really happening”? “Did I really just shoot Junkyard?!”
Yes, he did!
Boy wins round two!
So how big is Junkyard really?
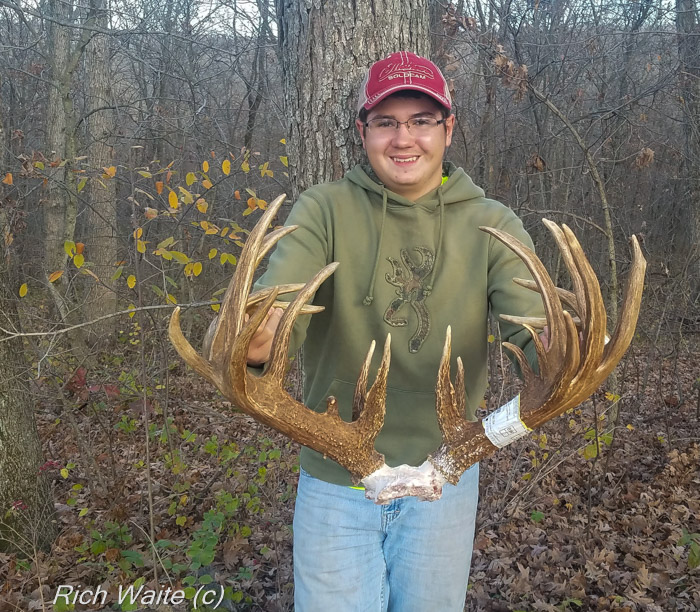
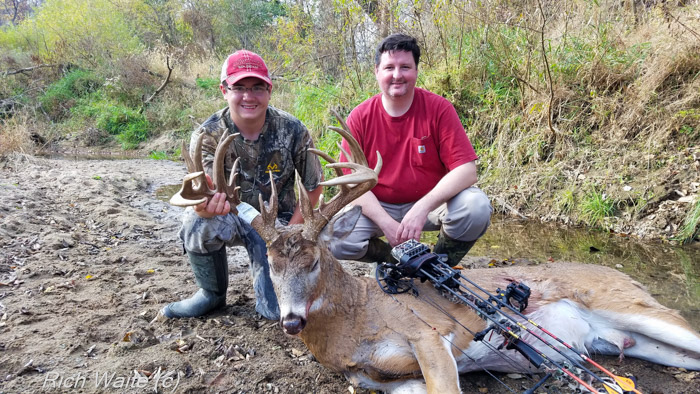
He’s pretty BIG indeed! Here Tyler hold up the antlers and skull plate of Junkyard!
“We decided to take him right up to the Pope and Young Headquarters in Chatfield, Minnesota, to
have him officially scored”, said Doug.
After the 60-mandatory drying period, the official score revealed a gross score of 226 6/8 inches
and a net score of 222 inches even!
The Iowa mega-giant buck has 21 scoreable points and tons of mass. The Iowa monster buck has over 60-inches of “Junk” in abnormal points!
What a buck – to say the least!
And before the fat lady could sing her last tune that season, Tyler downed another buck: this one
with the help of his trusty muzzleloader during Iowa’s late season!
Only in Iowa! Perhaps.
Though, it wasn’t as big as either of his first two bucks that season it was a nice buck nonetheless.
Lots of antler inches!
It turns out that Tyler downed over 515-inches of whitetail antler during the 2016 Iowa deer hunting season!
And it turns out that Junkyard is the biggest whitetail buck ever taken by any youth of 15-years or younger in anywhere in the world with a bow!
Not bad, one might say (of course, sarcastically to the n’th degree). Not bad at all!
But Doug AND Tyler are both as humble as ever and will tell you that they did nothing to deserve
the opportunity to harvest such a beast of a whitetail.
(Well, I’m thinking they must be doing something right and that whatever it is they are doing they
may not want to stop. Good Karma is nice to have following you around).
Interestingly enough, Doug had an age test done on Junkyard so they could pinpoint the buck’s using the
latest technology and most accurate method possible.
It’s forensic aging using the cementum annuli method and it’s very accurate!
It turns out the Iowa monster buck that has come to be known as Junkyard was just 4.5 years old!
A truly amazing Iowa whitetail!
A truly amazing anywhere whitetail!
But mostly – A truly amazing young hunter named Tyler!
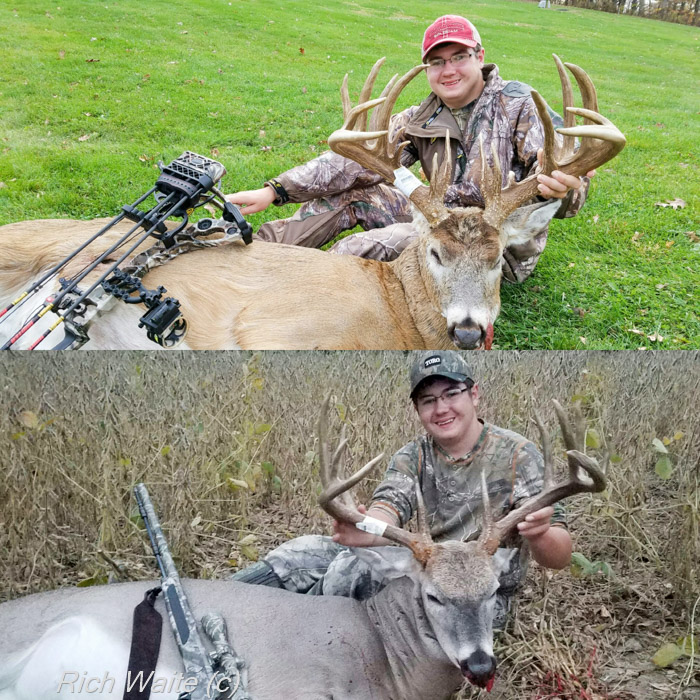
Here’s a picture of 14-year old Tyler with Junkyard. Oh, and the 165″ buck he happened to shoot that same fall out of a tin-shack!
Note: All Photographs courtesy of Doug and Tyler Knott. Copyright 2016 -- All Rights Reserved.
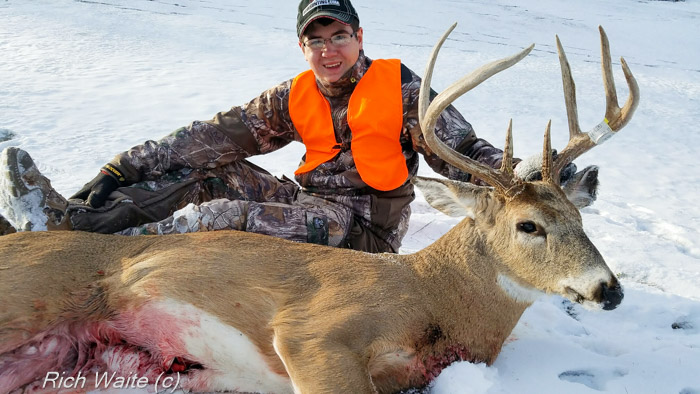
Junkyard and Tyler
Tyler and Junkyard!
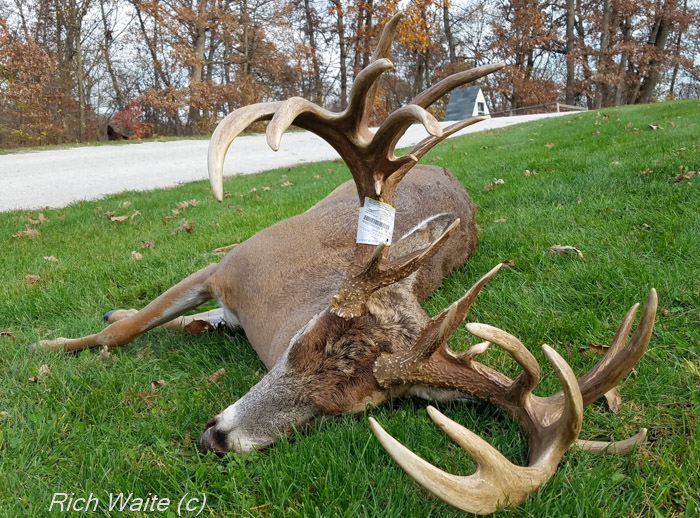
Junkyard head on ground
Here’s a picture of Junkyard.
Another Junkyard pose!
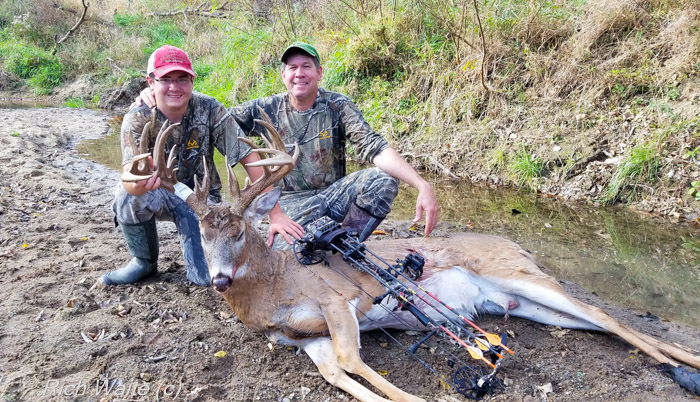
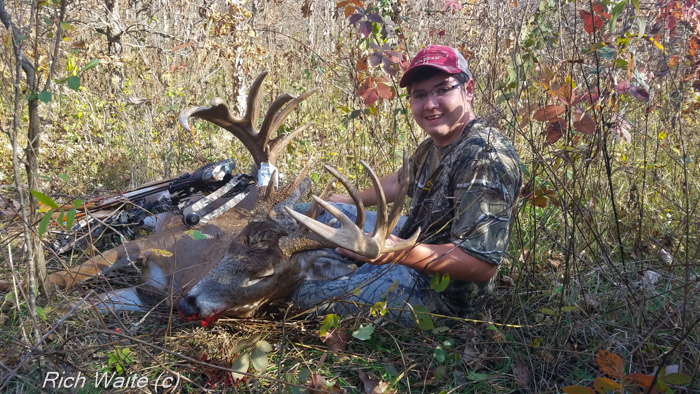
Here Tyler and his father Doug pose with the one and the only — Junkyard buck!
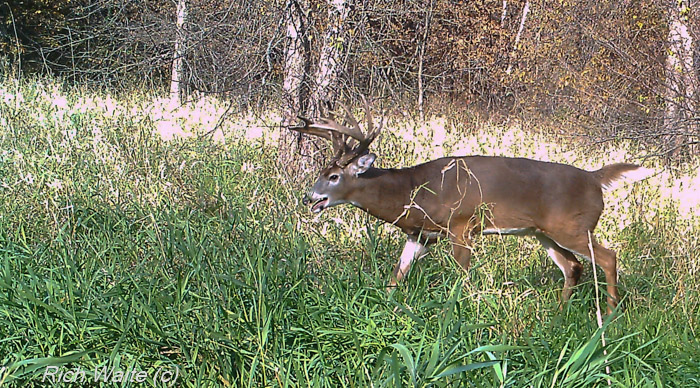
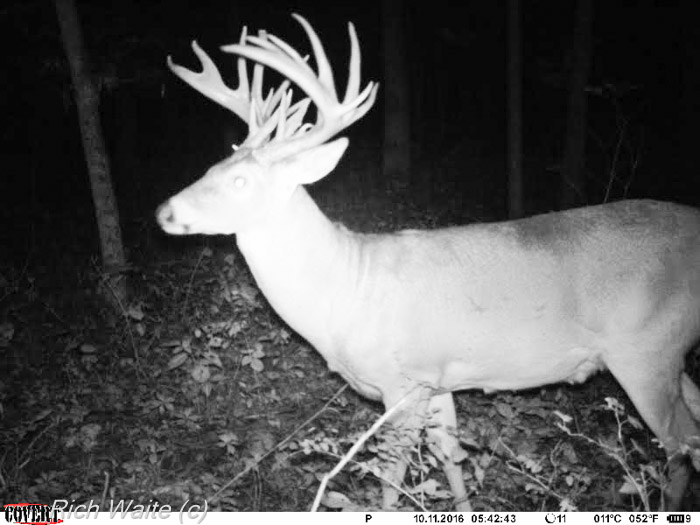
Here’s a trail camera shot of Junkyard from the fall of 2016. This picture was taken just two days before Tyler shot him with his bow!
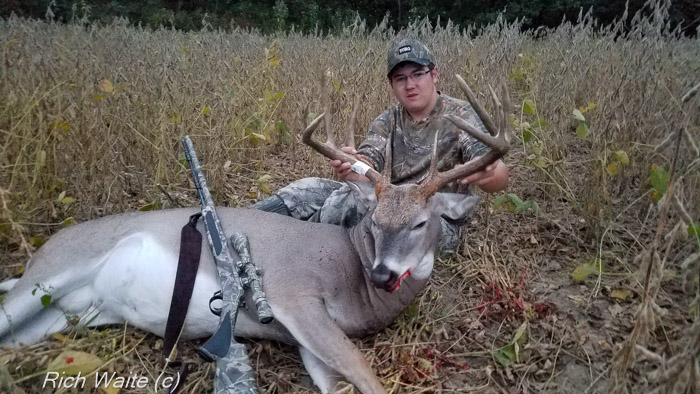
Tyer and his 165″ inch Iowa “tin-shack” buck!
Here’s Tyler with his 128″ Iowa late muzzleloader buck.